I live in a three level home which is a terrible location for a wifi network to provide full home network coverage. Interestingly enough, the home I used to live prior was much larger but my good old 8 year old Linksys wireless N router never had any issues covering 4000 sq.feet between two levels. When I moved to the current home I live now, I chose to have my cable modem installed at the basement level (which was a terrible mistake). The walls of this home seem to have lead in it which almost makes the home sorts of a Faraday cage killing the signal strength on the top level.
Hence started my quest to find a router that worked across all three levels.
Setup 1:
My first move was to buy a cheap router (D-Link) and use it as slave to my primary Linksys router at the basement. I decided to buy a NetGear Powerline Adapter to extend the Ethernet connection to my third floor and then use the D-link router to setup a slave network. In theory this sounded fine, on implementation a few issues arose. I had two distinct wifi networks in my home and I had to switch between networks as I roamed around. Not to mention the fact both the Linksys and D-Link routers had dual-band radios for 2.4 Ghz and 5 Ghz, so I had 4 wifi networks in total!
Why can’t you disable one of the radios you ask? Well the 5 Ghz does extremely well for short distance applications (like streaming Apple TV) while the 2.4 Ghz radio crosses walls better. To make things more interesting, I had the 5 Ghz radios in Wireless-N mode while 2.4 Ghz band operated in Wireless G/B mixed mode to provide compatibility to older devices at home. (As crazy as it may sound, an average home these days can easily have more than 20+ wireless devices considering all of the the cell phones, tablets, SMART TVs, Laptops, Media Players, Smart Home Assistants like Alexa, refrigerators etc).
Setup 1 worked OK for a while but I was getting mysterious signal drops on wifi when I was in the slave network on the third level. The connection would randomly freeze and I would have to reset the wifi radio on my phone to get the connectivity back on. I was not sure what the culprit was. By process of elimination, I could tell the basement Linksys router was working OK and the slave D-Link upstairs was working fine as well. (I swapped them and the problem still persisted). This made me conclude the culprit may be the NetGear Powerline adapter (which uses the home electrical connectivity as an extended wired Ethernet network).
To test this theory out, I bought a TP-Link Nano Ethernet Poweline adapter to see if it solved the problem. After swapping it with the NetGear, the problem seemed to have gone away for a few days and then it was back again.
House 1: Me 0.
Setup 2:
Based on lessons learnt on Setup 1, I realized there may be a hidden electrical goblin in my house wiring eating my IP packets. I started exploring alternate options like wifi extenders which technically extend the same wifi network across a bigger area. I ended up buying the Amped wireless extender and connected that to my basement Linksys router. While this seems to have marginally solved the problem, I was still having intermittent issues with connectivity dropping randomly which was quite frustrating. After a 2 week trial run, I returned the Amped back to Costco.
House 2: Me 0.
Setup 3:
By now I was starting to think the issues may be with my Linksys router which did not have a firmware update from Cisco in 4 years. I started researching new routers. This is when Google got into the router business and launched their OnHub router with the help of TP-Link and Asus. OnHub was google’s first foray into home networking business. The OnHub was supposed to solve all of the coverage issues. I was ready to cry tears of joy and drove to BestBuy to pick it up on Day 1 when it was released.
OnHub ended up being a huge disappointment. Since it was a router on its own respect, I replaced the basement Linksys with the OnHub. The setup was super easy with a smartphone app which configured all the settings which was very cool (compared to the legacy admin consoles hosted at 127.0.0.1 in your older routers). It was definitely very user friendly but ultimately failed the important test of not being able to have the range to penetrate the lead-laden walls of my house to the third level. I mucked around with various settings in vain. However the best speed which I was able to get on the third level was a measly 750 kbps. No YouTube or Netflix streaming while I was in bed.
House 3: Me 0.
Setup 4:
OnHub was promptly returned after 3 days of testing as it didn’t quite cut it for my needs. At this point I was fairly disillusioned with fancy new routers and did more research to find the holy grail of routers. After reading many reviews on The Wirecutter, I finally decided to give the Archer C9 a try. The Archer C7 was rated as one of the best router (for most people) by The Wirecutter in the market. I picked up the Archer C9 from Costco. The added bonus was it came with a range extender which worked out of the box.
The Archer C9 seemed to do OK on most of my testing and has been my primary router for the past year. The extender would take the same wifi network name, so I did not have to keep switching networks as I moved around the house. However I did notice a little bit of lag in streaming speeds on the third level. It worked most of the times, but sometimes it would make me reset the wifi radio in my phone to get it to work again. (By now you may have realized that turning wifi on/off has been something I do at least a few times in an average day and over a period of four years it gets mighty annoying. You ultimately give up and accept it as price to pay to have a wifi connection – I keep reminding myself of pre-wifi days during when I went and bought a 100 meter Ethernet cable 12 years ago when wifi was not a common concept!)
House 3.5: Me 0.5.
Setup 5:
Recently I came to know about a new concept where a new breed of mesh networked home wifi equipment that have been popping up in the home network scene. Most prominent of those were NetGear’s Orbi, Eero Home wifi, Luma Home and Google Wifi.
I stayed away from making a leap into this scene as these equipment were all quite pricey. (Typically more than $400). However when I watched the Google Hardware event on October 4’th, I was blown away by some of the things Google launched/announced. They had a wide range of products from Pixel Phone to VR goggles and then Google Wifi. Watch this video starting at minute 50 to catch the Google wifi announcement. The pricing seemed reasonable for the three pack unit starting at $300. I decided to give one final shot and preordered the Google wifi from Amazon.
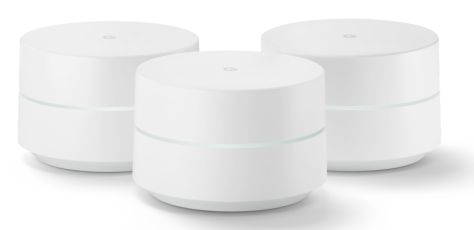
I received Google wifi 3-pack today and opened it to perform the setup. The packaging was very apple like. There was just a quick start card inside along with the units and power cords and an Ethernet cable. Very simple and spartan. Following the quick start instructions, I downloaded the Google wifi app on the app store and started the installation process.
I setup the circular hockey puck looking units (a little larger than that) at each level in my home. These devices are beautifully designed and blend into the environment. The bottom of the devices have the SSID of the unit and a password to connect to it (Note: You will only use this SSID and password during setup).
Setup was a little confusing to start with. The App was attempting to connect to an unit without asking me to join to the SSID broadcast by the base unit. I had to manually switch to phone system wifi settings to connect to the SSID of the base unit. At that point, the setup app took over and asked me to name the location where I placed the unit (basement) and asked me to also name the home network.
Once I did this step and the network was created, the app asked me if I had more Google wifi units. I had two more units I needed to setup. The app again went on a wild goose chase trying to locate both the units. I had to now switch to phone wifi settings to identify the unit by name on my family room. Once I connected to this unit using the user id and password at the bottom of the unit, the app took over again. This time the app recognized it as a peer unit and configured it part of the home mesh network. I repeated the same steps for the unit on my third level and it connected to the network like a charm. I breathed a sigh of relief when I realized all of the three units were part of the mesh network and were under the home network SSID I created when I setup the first unit.
Now to the acid test. Speed Test app blazed through on all three levels with speeds consistently exceeding 70 Mbps. I tested the speeds while I was stationary on all three levels. Then to put the system to the test, I started a Speed Test and moved around the house where I knew the connectivity would be weak. Impressively enough I could see the speeds slowing a bit on dead spots but the mesh network came to rescue with another unit picking up the signal seamlessly and I could visually see the speeds normalizing to the 50 Mbps and above threshold.
Finally I think I have a winner with Google wifi!
The best part about this is I hope I do not have to keep resetting the wifi to stream YouTube on my visiting mother in law’s iPad which is worth its weight in gold!
Home KO: Me ![]()
